
حل مشكلة تشغيل الكاميرات في متصفحات لاتدعم فلاش بلاير
EM6325 Flash player, no live video image in the Windows browser and setting motion detection zones
Option (1) Use Internet explorer with custom settings
Download Flash player first :
Install_flash_player_32_for_Explorer
Right button on downloaded zipfile and press “Extract” .
Run the installation of the Flashplayer.
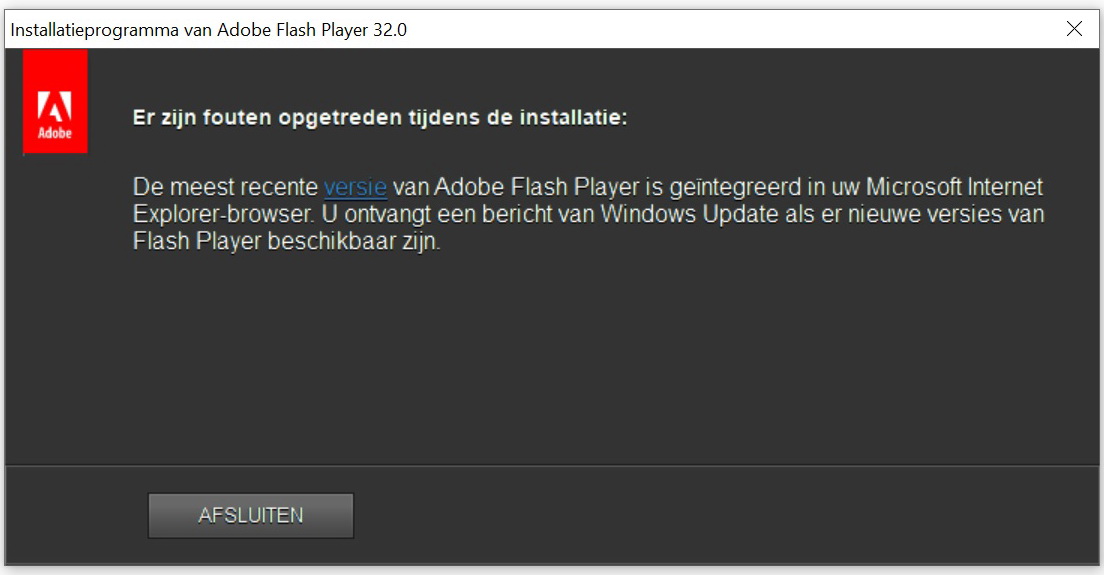
When you get the message like below, the you already have already Flash player installed on your system. Press “Close”
Open the Internet explorer, The file iexplore.exe you can find in the folder below :
C:\Program Files\Internet Explorer\iexplore.exe
When the path does not exist, please follow steps below.
– Press Windows key and at the same time Xs.
– Press “Execute”, and type “optionalfeatures” followed by “ENTER” button.
– Search in this list for “Internet Explorer 11” and select the box.
– Press OK and reboot the PC.
The IE is installed now.
First time start of Internet Explorer, you can get the message”Internet Explorer 11 settings” .
Select “Don’t use recommended settings” and press”OK”.
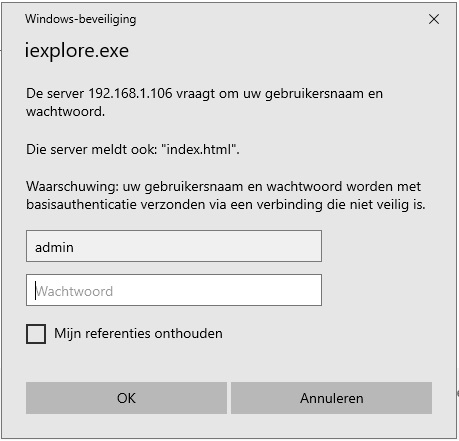
Now you can enter the ip address of your camera in the address bar, depending on your camera type followed with :443 or :81
For example : http://192.168.1.106:443 , The camera will ask to login with username: admin and your password.
Then at the right top in de internet explorer go to settings (cogwheel).
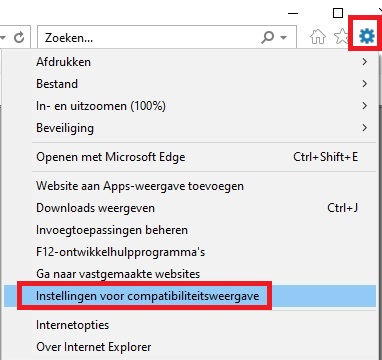
Then select “Compatibility View settings”.
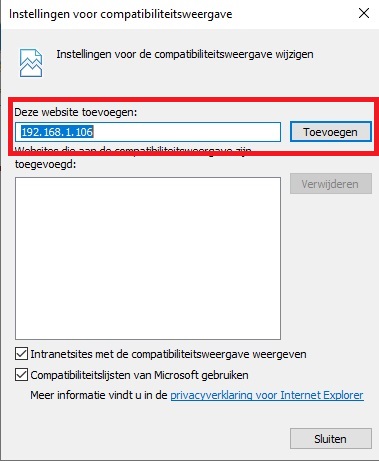
Add here the ip address of your camera and press “add” and “close”.
Close the Internet Explorer and start it again.
In the internet explorer fill in the ipadres again in the address bar, depending on your camera type followed with :443 or :81
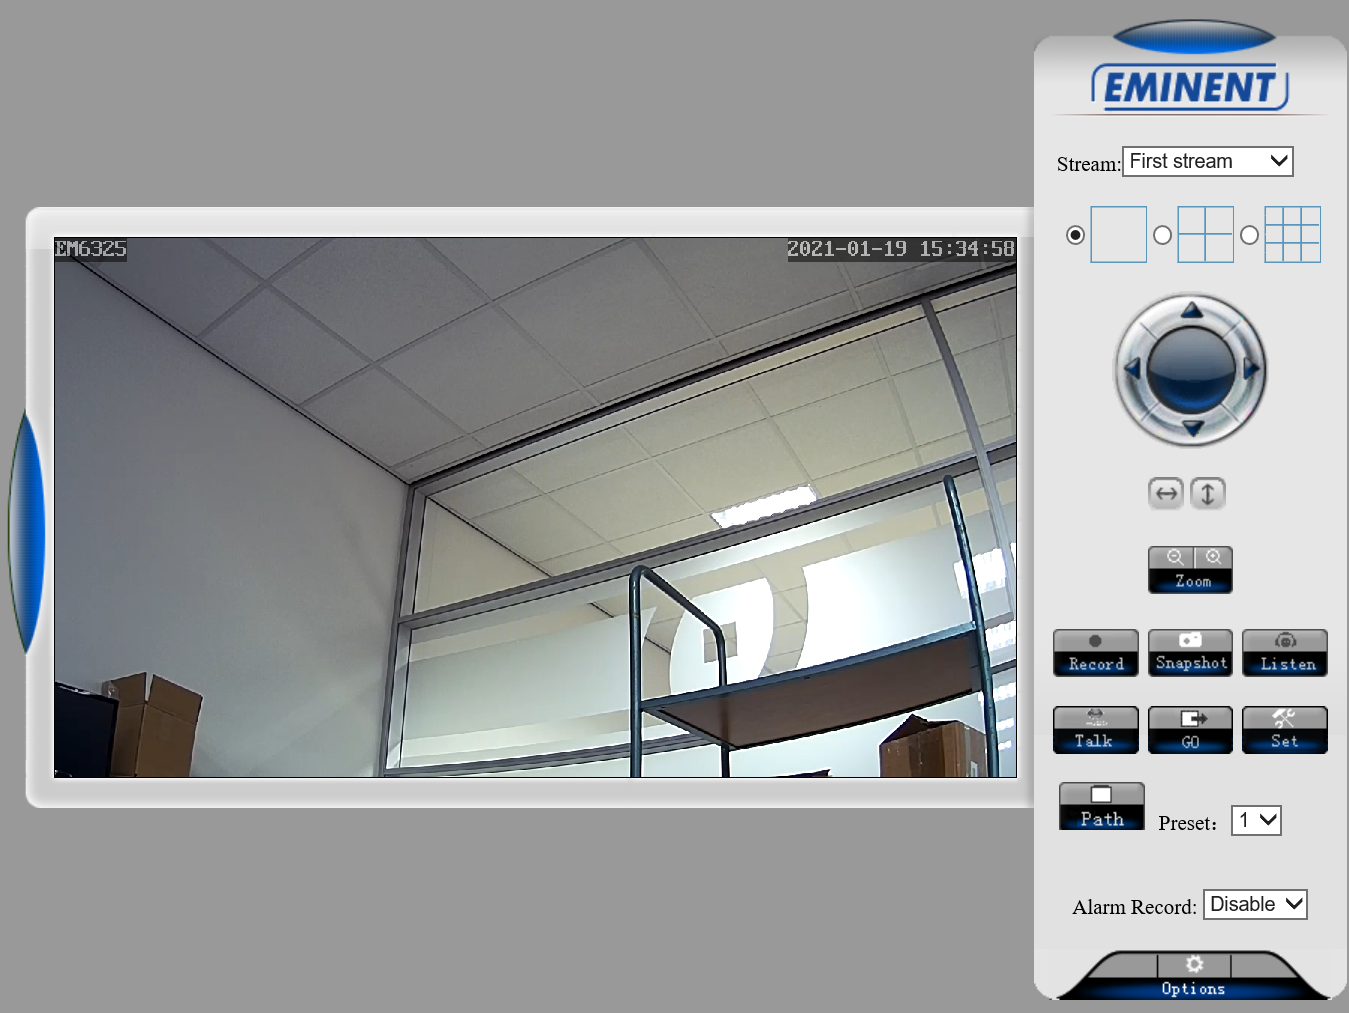
In the live view screen of your camera, you see the screen below.
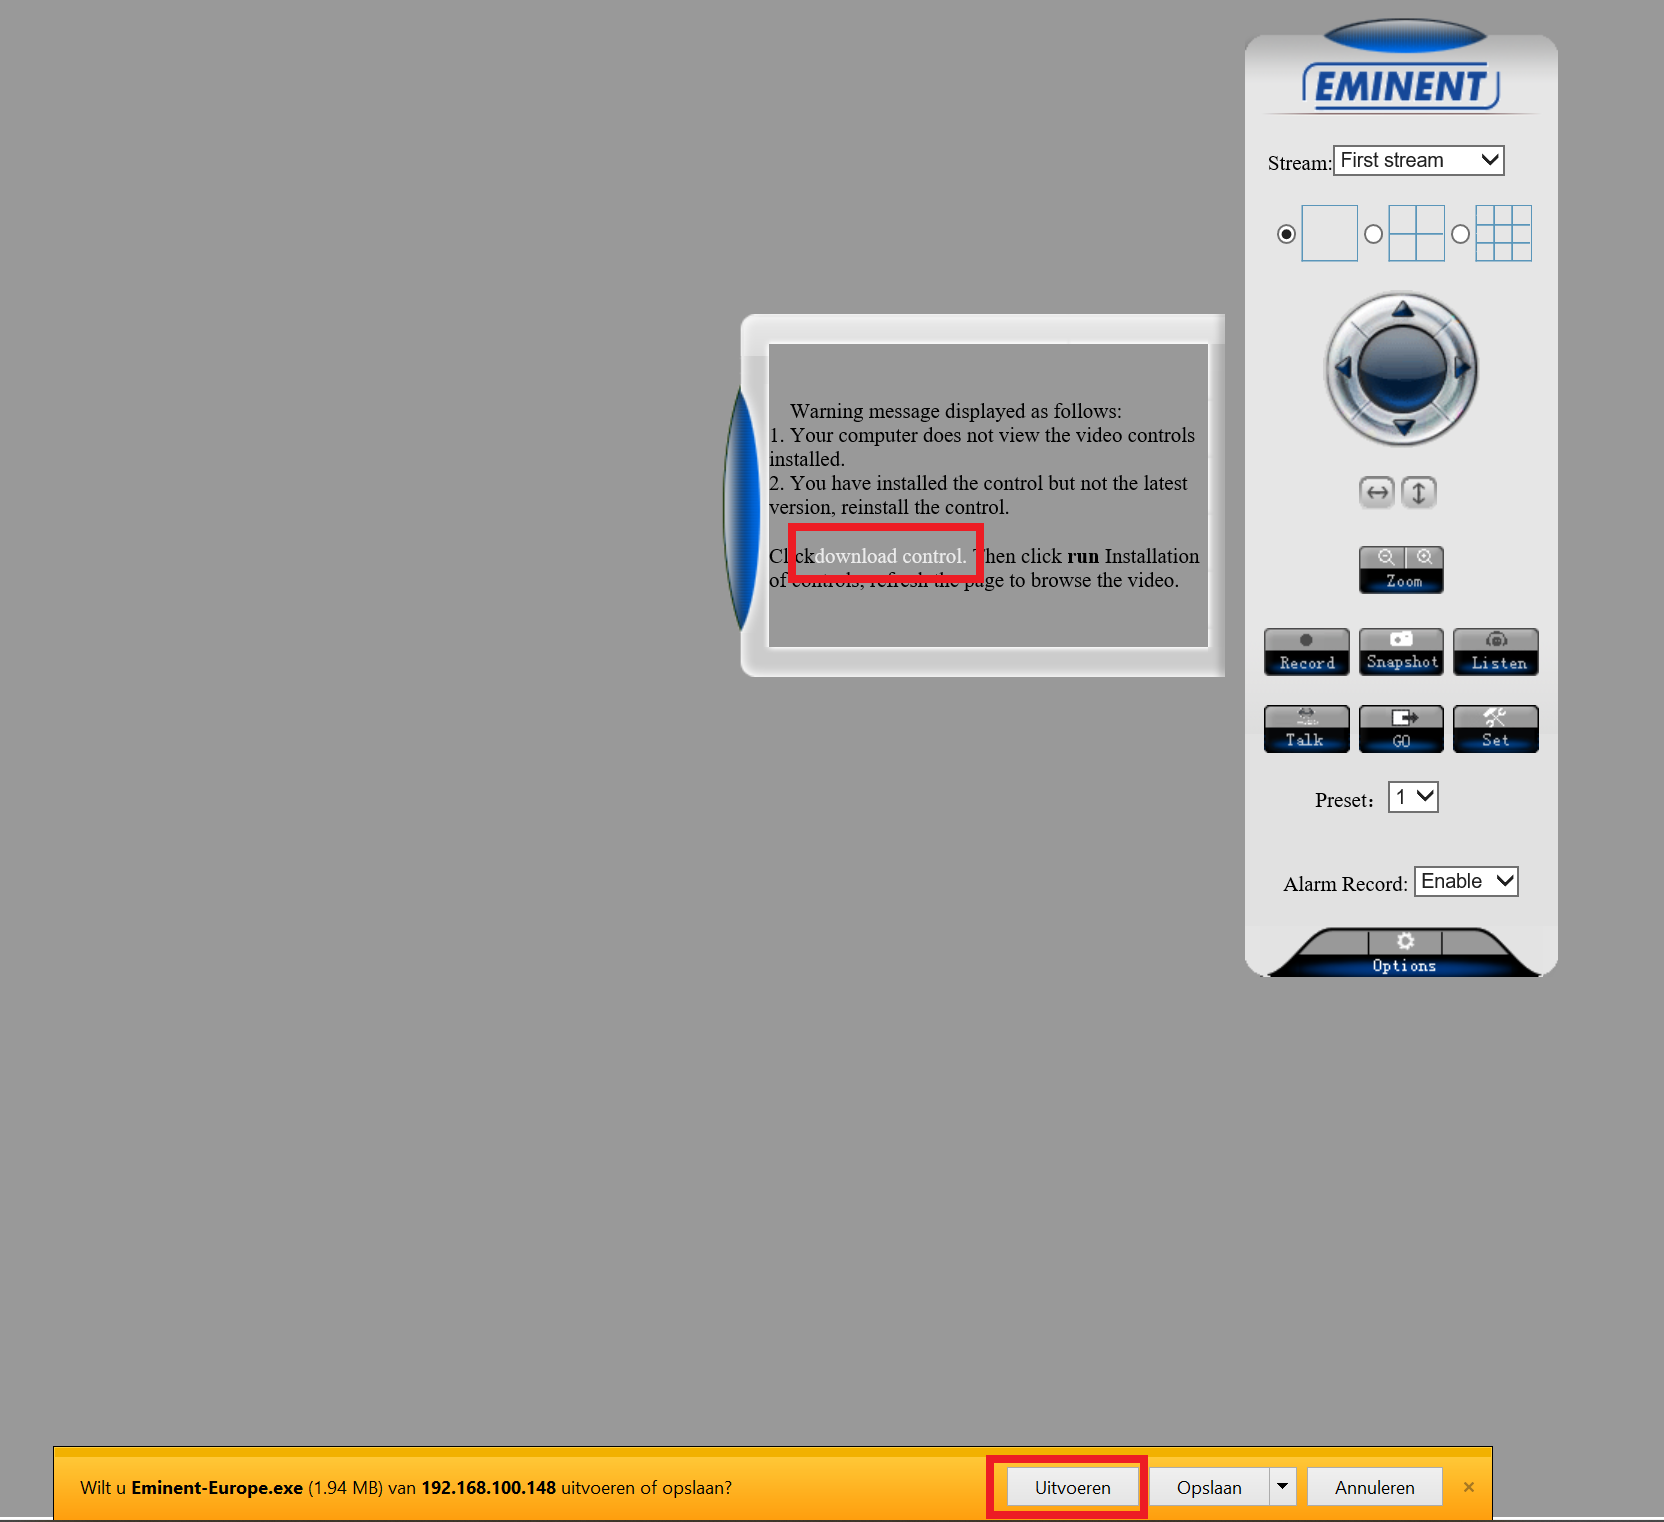 Press “download control” and then “Run”.
You could get a popup for “Useraccountcontrol” , and press “Yes”.
Press “Next” , and then “Install”
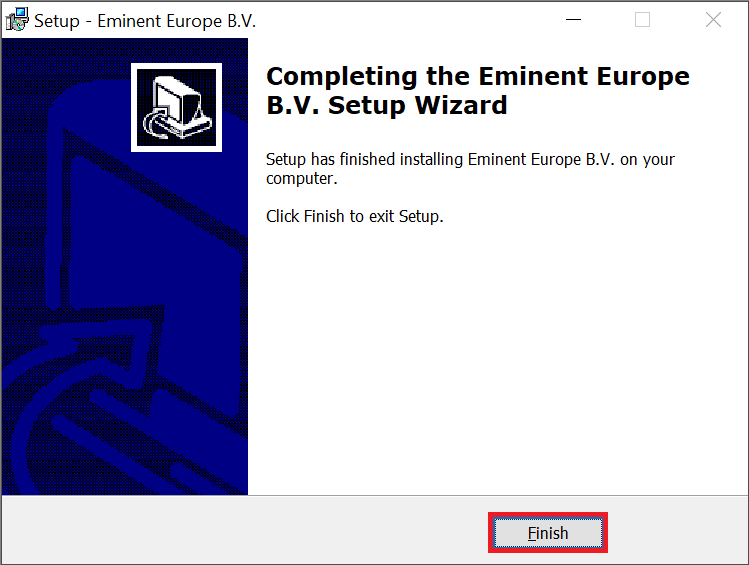
Follow the installation and press”Finish”
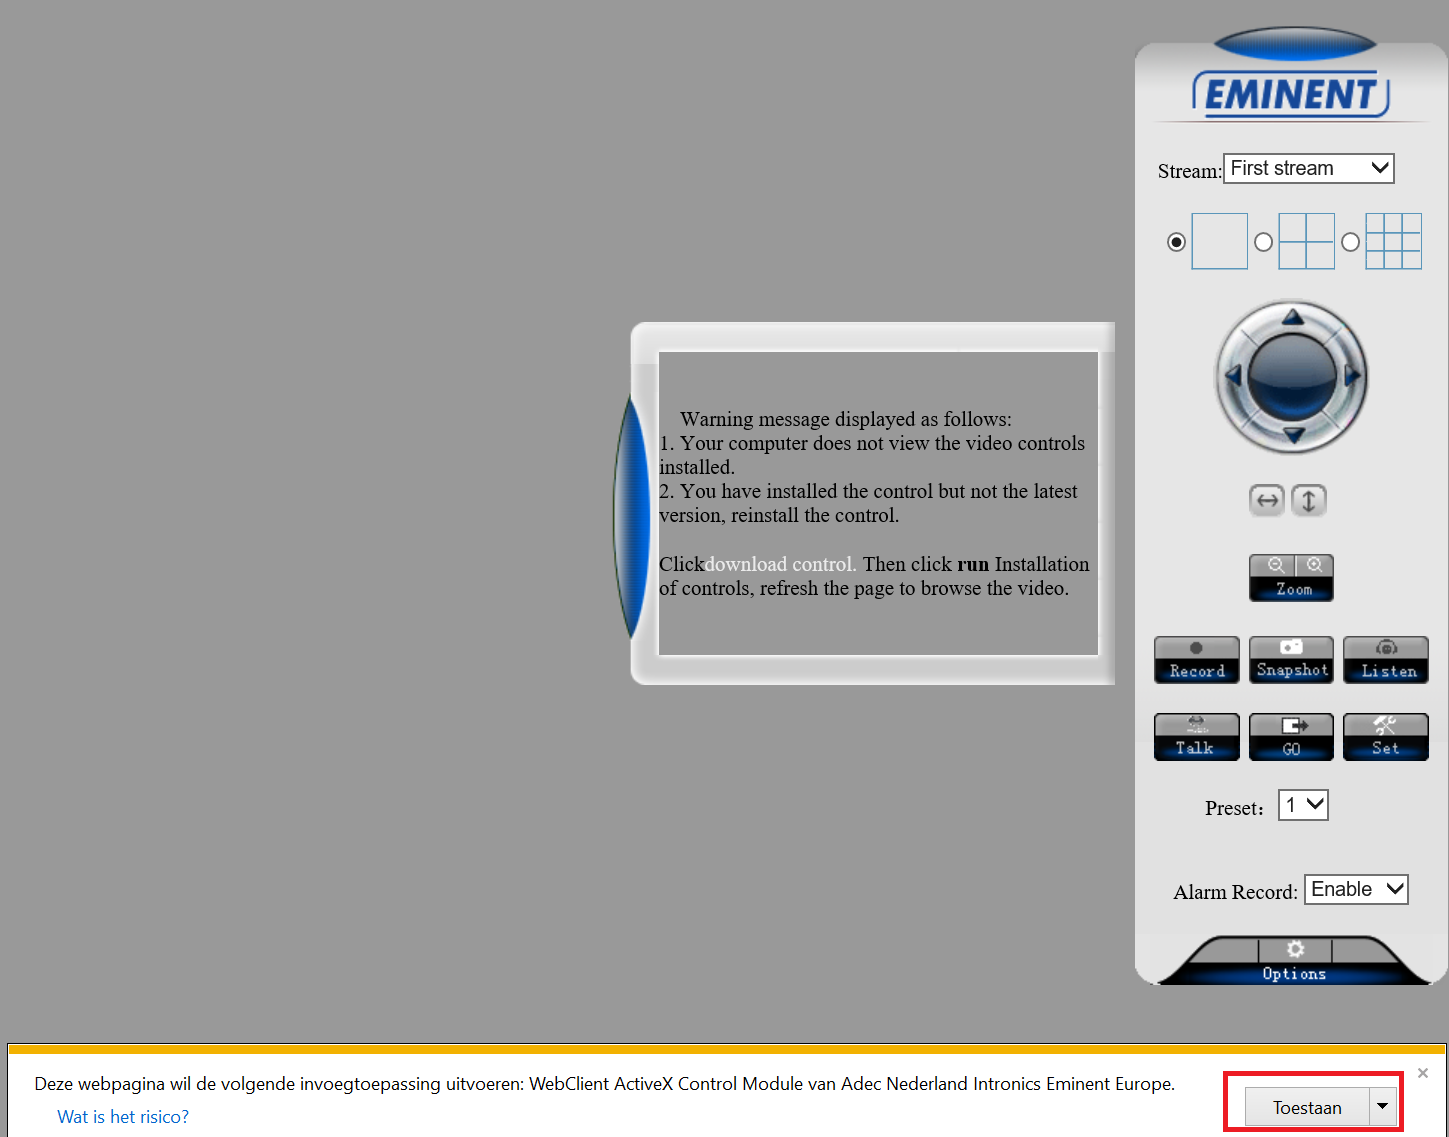
Now select the ip address in the address bar and press the “ENTER”button. the page will be refreshed.
Go to “Sign in” at Live video stream.
You will get a message to run “activeX” , select “Allow”
Now you can go to “Sign in” 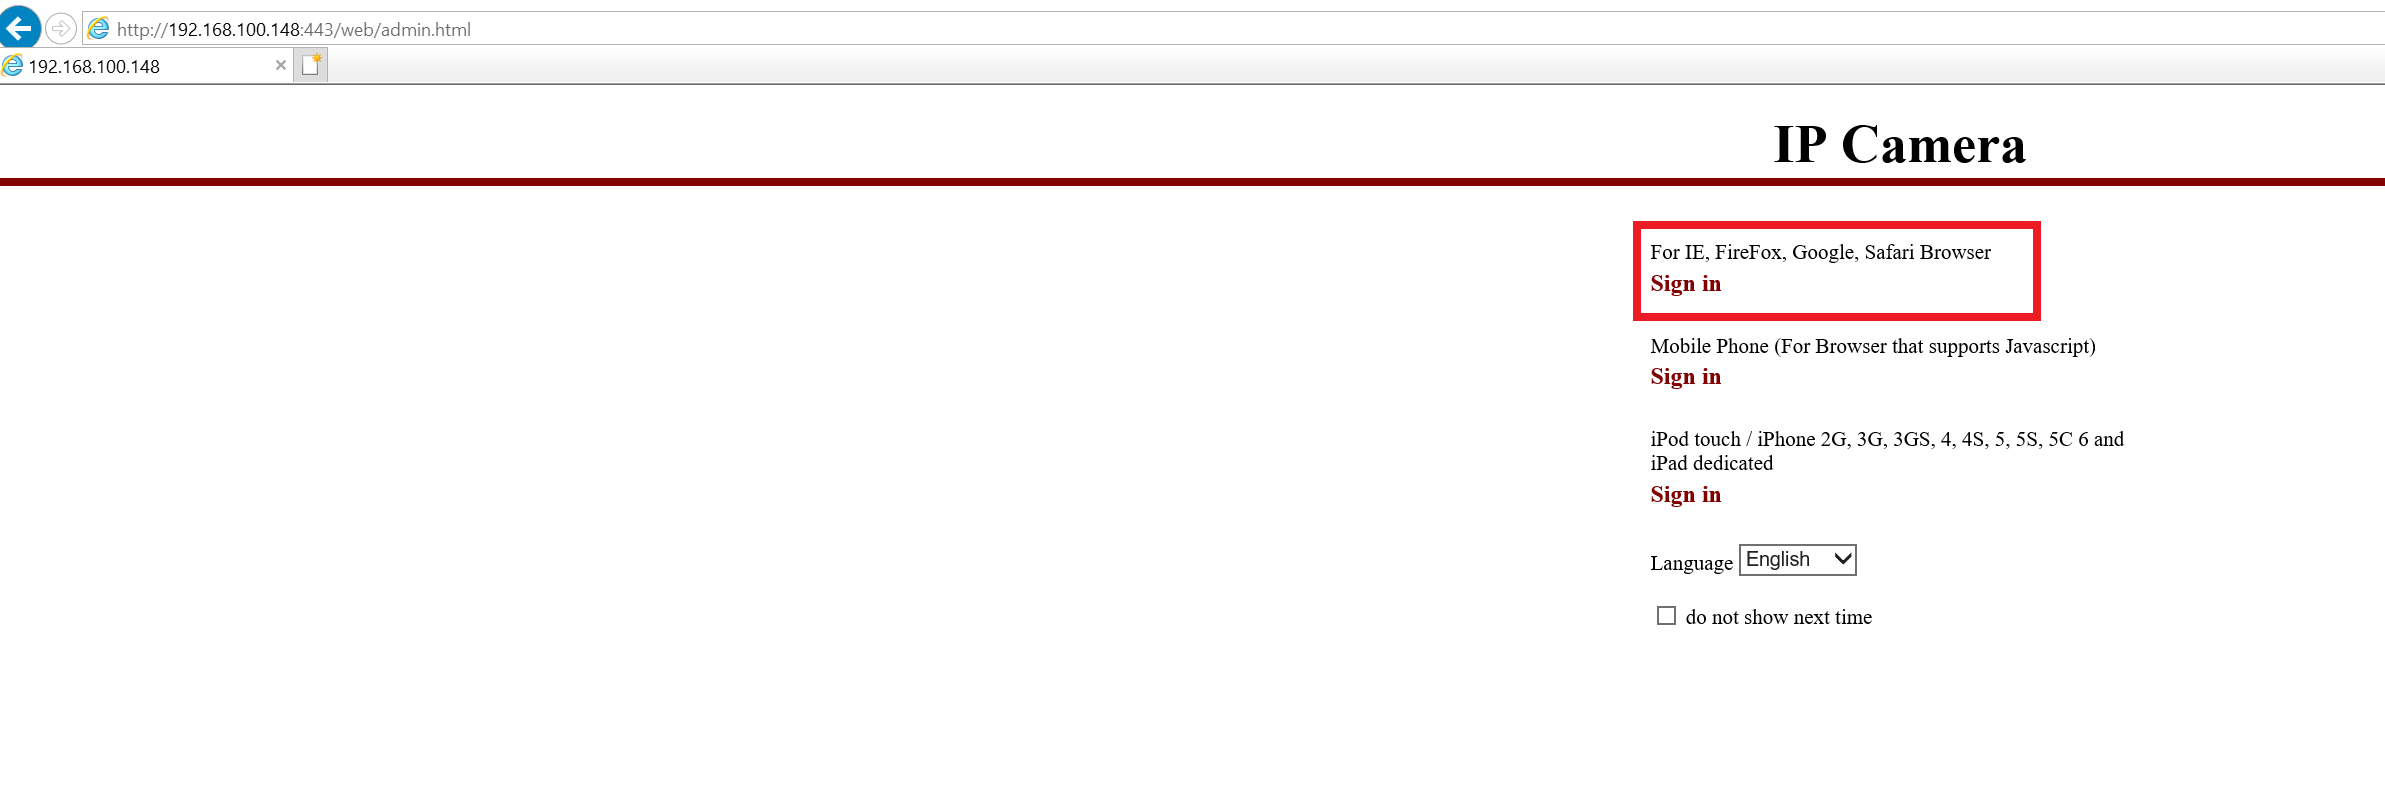
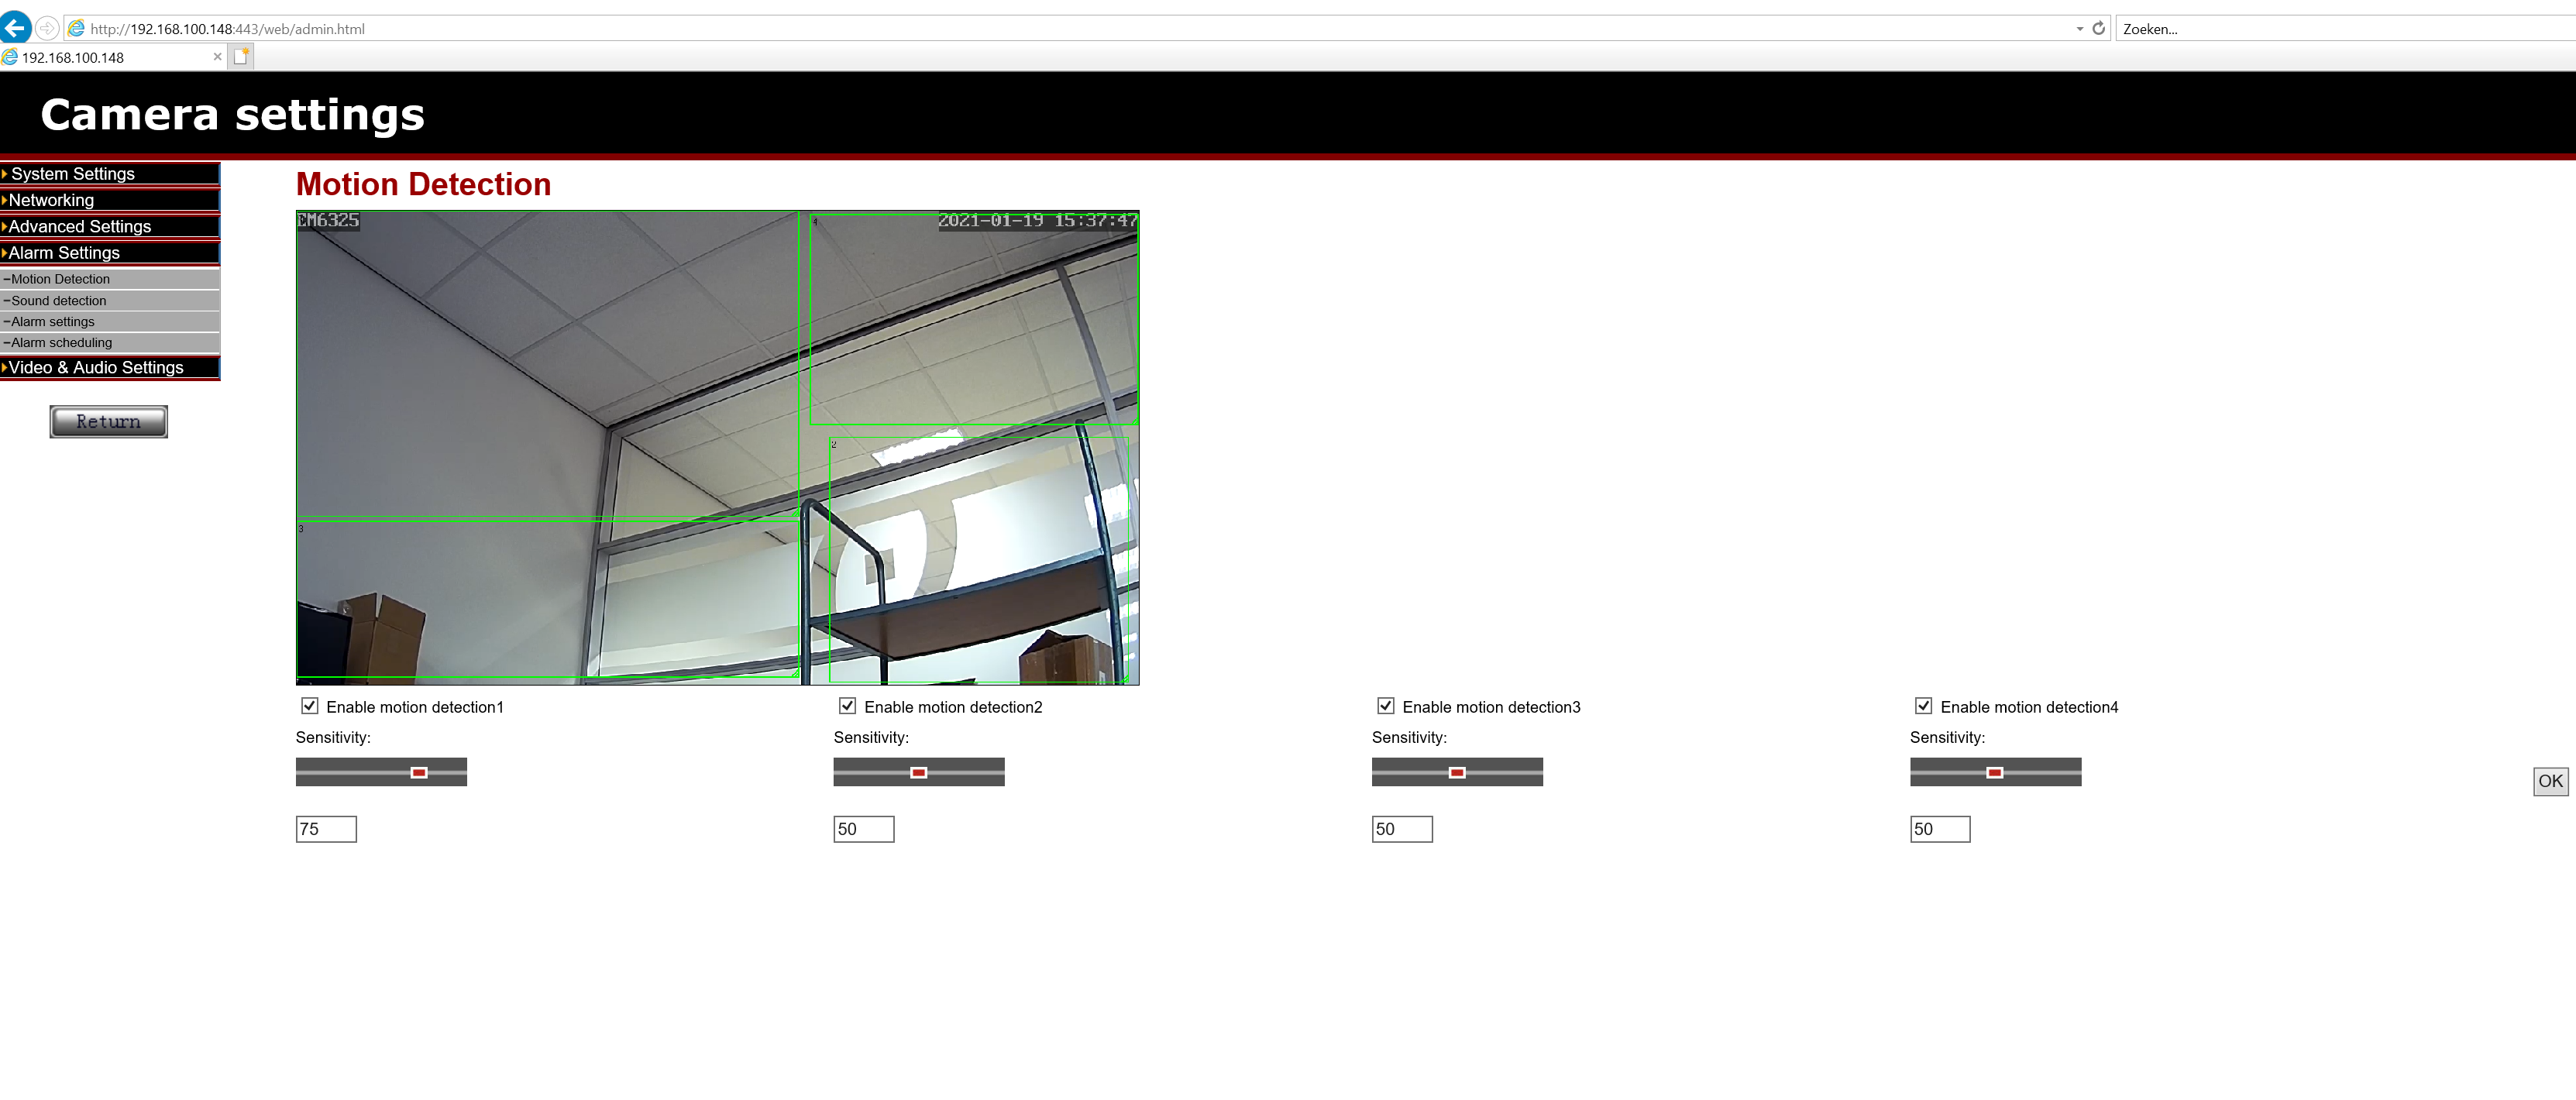
Now it is possible to view the Live video stream of your camera, and adjust the motion detection zones.
These settings will be saved activated even after a reboot of your computer you will be able to view the camera.
Option (2) Use a portable Firefox version
You can download the following Firefox browser with integrated Adobe Flash Player to view the live video images of your camera.
Download : Firefox portable
Extract the downloaded “FirefoxPortable” file first and then execute from this folder “FirefoxPortable.exe”.
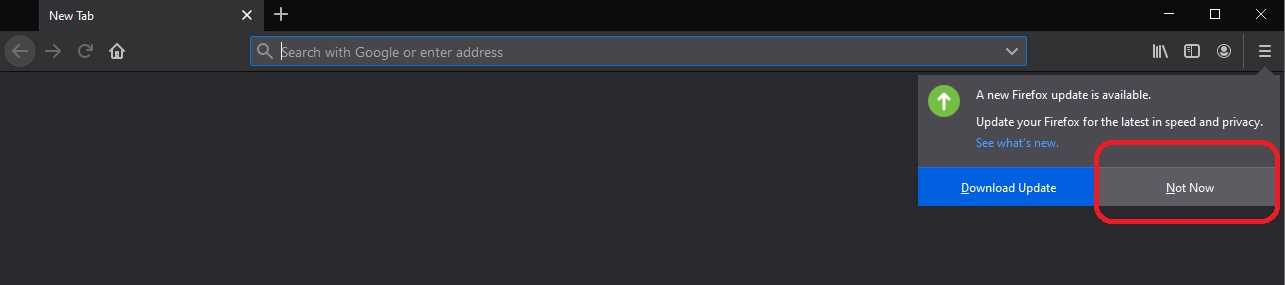
When you get the message to update the Firefox browser opstart, select “Not Now” because the Flash player won’t work when you update!
Please note ! : Use the Firefox browser only for viewing live images and change settings in your camera. This browser doesn’t have the latest updates. Therefore use your standard browsers, like Chrome and Edge, to surf on the internet!
Now you can enter the ip address of your camera in the address bar, depending on your camera type followed with :443 or :81
For example : http://192.168.1.106:443 , The camera will ask to login with username: admin and your password.
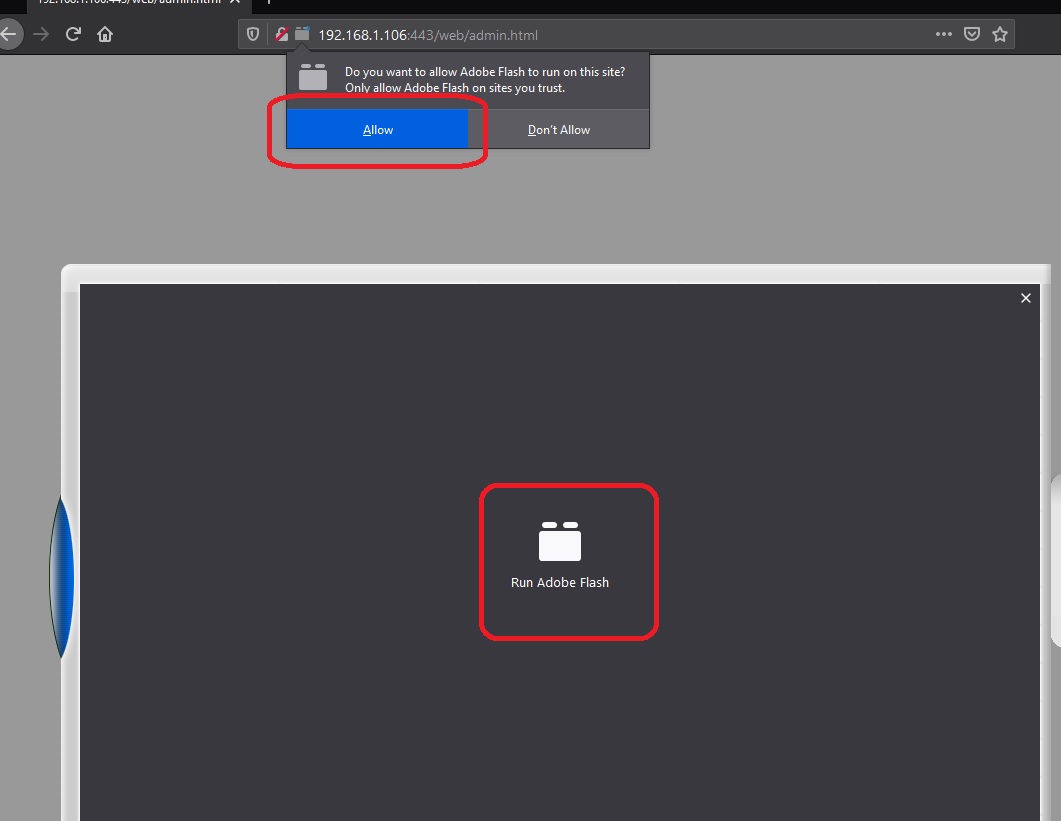
To activate the live video feed of the camera press “Run Adobe Flash” and then “Allow” .
Now you should be able to see the live video stream of your camera.